

How to repair a damaged Npt Threaded Flange?
Sep 10, 2025
Repairing a damaged NPT (National Pipe Taper) threaded flange is a task that requires precision, the right tools, and a good understanding of the process. As a supplier of NPT threaded flanges, I've seen firsthand the importance of being able to repair these components when they get damaged. In this blog post, I'll guide you through the steps to repair a damaged NPT threaded flange effectively.
Understanding NPT Threaded Flanges
Before diving into the repair process, it's essential to understand what NPT threaded flanges are. NPT is a U.S. standard for tapered threads used on pipes and fittings. The taper of the threads helps create a tight seal when the parts are assembled. NPT threaded flanges are commonly used in various industrial applications, including plumbing, oil and gas, and manufacturing. Carbon Steel Threaded Flange is one type of NPT threaded flange, known for its durability and strength. BSP Threaded Flange and DIN Threaded Flanges are also popular in different regions and industries.
Assessing the Damage
The first step in repairing a damaged NPT threaded flange is to assess the extent of the damage. Here are some common types of damage you might encounter:
- Thread Damage: This can occur due to over-tightening, corrosion, or improper installation. Look for stripped, worn, or damaged threads on the flange.
- Cracks: Cracks can develop in the flange body due to stress, impact, or thermal cycling. Inspect the flange carefully for any visible cracks.
- Deformation: The flange may be deformed if it has been subjected to excessive force or pressure. Check for any signs of bending or warping.
Gathering the Necessary Tools and Materials
Once you've assessed the damage, gather the tools and materials you'll need for the repair. Here's a list of common items:
- Thread Repair Kit: This kit typically includes taps, dies, and thread inserts. Make sure to choose a kit that is compatible with the NPT thread size of your flange.
- Welding Equipment: If the flange has cracks or requires structural repairs, you'll need welding equipment, such as a welding machine, electrodes, and safety gear.
- Grinding Wheel: A grinding wheel can be used to remove any burrs, rust, or damaged material from the flange surface.
- Cleaning Solvent: Use a cleaning solvent to remove any dirt, grease, or debris from the flange before starting the repair.
- Sealant: A high-quality sealant is essential to ensure a leak-free connection after the repair.
Repairing Thread Damage
If the threads on the NPT threaded flange are damaged, you can use a thread repair kit to fix them. Here's how:
- Clean the Flange: Use a cleaning solvent and a wire brush to clean the damaged threads thoroughly. Remove any dirt, rust, or debris.
- Select the Correct Tap or Die: Choose the tap or die that matches the NPT thread size of your flange. Make sure the tap or die is in good condition and free from any damage.
- Repair the Threads: If the threads are only slightly damaged, you can use a die to re-cut the threads. Insert the die into the damaged threads and turn it clockwise, applying gentle pressure. If the threads are severely damaged, you may need to use a tap to create new threads. Insert the tap into the damaged threads and turn it counterclockwise, applying gentle pressure.
- Remove Burrs: After re-cutting or creating new threads, use a grinding wheel or a file to remove any burrs or sharp edges from the threads.
- Apply Sealant: Once the threads are repaired, apply a high-quality sealant to the threads to ensure a leak-free connection.
Repairing Cracks
If the NPT threaded flange has cracks, you'll need to weld them to restore the structural integrity of the flange. Here's how:
- Prepare the Welding Area: Use a grinding wheel to remove any rust, paint, or damaged material from the crack area. Make sure the welding area is clean and free from any contaminants.
- Choose the Right Welding Process: Depending on the type of flange material and the size of the crack, choose the appropriate welding process, such as arc welding or MIG welding.
- Weld the Crack: Start welding at one end of the crack and work your way to the other end. Use a steady hand and apply the appropriate amount of heat and filler material. Make sure the weld is smooth and free from any defects.
- Grind the Weld: After the weld has cooled, use a grinding wheel to grind the weld flush with the flange surface. Make sure the weld is smooth and free from any rough edges.
- Inspect the Weld: Inspect the weld carefully for any signs of cracks or defects. If necessary, re-weld the area to ensure a strong and reliable repair.
Repairing Deformation
If the NPT threaded flange is deformed, you may need to use a press or a hydraulic jack to straighten it. Here's how:
- Support the Flange: Place the deformed flange on a flat surface and support it securely to prevent further damage.
- Apply Pressure: Use a press or a hydraulic jack to apply pressure to the deformed area. Apply the pressure gradually and evenly to avoid causing additional damage.
- Check the Alignment: As you apply pressure, check the alignment of the flange using a straightedge or a level. Make sure the flange is straight and parallel to the mating surface.
- Repeat the Process: If necessary, repeat the process until the flange is fully straightened.
Testing the Repaired Flange
After completing the repair, it's important to test the NPT threaded flange to ensure it is functioning properly. Here's how:
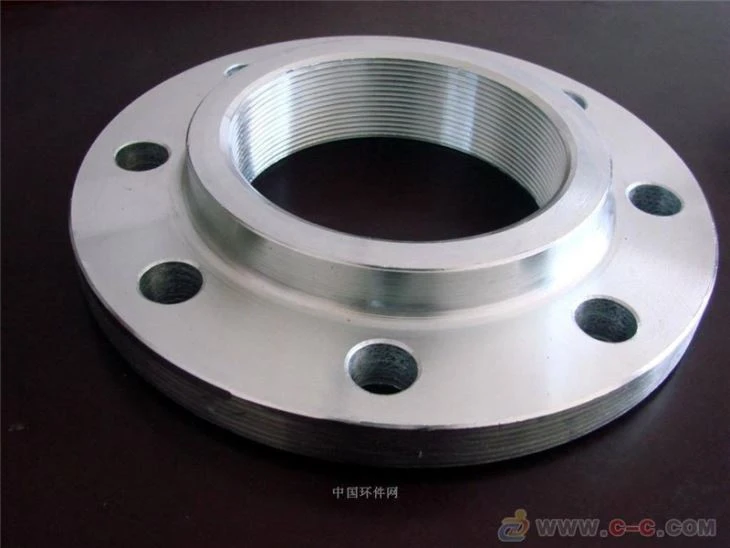

- Inspect the Flange: Inspect the repaired flange carefully for any signs of damage or defects. Make sure the threads are in good condition and the welds are strong and reliable.
- Install the Flange: Install the repaired flange onto the pipe or fitting using the appropriate tools and techniques. Make sure the flange is tightened to the recommended torque specification.
- Pressure Test: Conduct a pressure test to check for any leaks. Apply the appropriate pressure to the system and monitor the flange for any signs of leakage. If there are any leaks, re-tighten the flange or repeat the repair process.
Conclusion
Repairing a damaged NPT threaded flange is a challenging but rewarding task. By following the steps outlined in this blog post, you can effectively repair a damaged flange and restore its functionality. Remember to always use the right tools and materials, follow the safety guidelines, and test the repaired flange before putting it back into service.
If you have any questions or need further assistance with NPT threaded flange repair or procurement, please feel free to contact us. We're here to help you find the best solutions for your industrial needs.
References
- ASME B1.20.1 - Pipe Threads, General Purpose (Inch)
- API 6A - Specification for Wellhead and Christmas Tree Equipment
- ASTM A105 - Standard Specification for Carbon Steel Forgings for Piping Applications