

How to install DIN steel flange bolts and nuts?
Sep 08, 2025
Hey there! As a supplier of DIN steel flanges, I often get asked about how to install DIN steel flange bolts and nuts. It's a crucial part of getting your piping system up and running correctly, so I thought I'd share some tips and tricks with you all.
First off, let's talk about what DIN steel flanges are. DIN, which stands for Deutsches Institut für Normung, is a German organization that sets standards for a wide range of products, including steel flanges. DIN steel flanges are used in piping systems to connect pipes, valves, pumps, and other equipment. They come in different types, such as the DIN 2576 Slip On Steel Flange, DIN 2573 Steel Flange, and DIN Standard Steel Forged Flange. Each type has its own unique features and applications, so it's important to choose the right one for your project.
Now, let's get into the installation process. Before you start, make sure you have all the necessary tools and materials. You'll need a set of DIN steel flange bolts and nuts, a wrench or socket set, a gasket, and a pipe cutter if you need to cut the pipes to the right length.
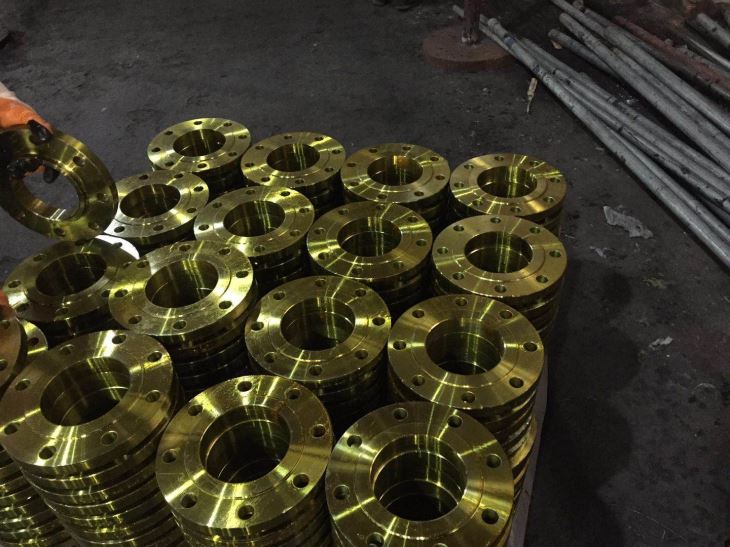

Step 1: Prepare the Pipes and Flanges
The first step is to prepare the pipes and flanges. Start by cleaning the ends of the pipes and the mating surfaces of the flanges. Use a wire brush or sandpaper to remove any rust, dirt, or debris. This will ensure a good seal between the flange and the pipe.
Next, check the alignment of the pipes. Make sure they are straight and parallel to each other. If the pipes are not aligned correctly, it can cause leaks and other problems later on. You can use a pipe alignment tool to help you with this.
Step 2: Install the Gasket
Once the pipes and flanges are clean and aligned, it's time to install the gasket. A gasket is a thin, flexible material that is placed between the flanges to create a seal. There are different types of gaskets available, such as rubber, asbestos, and metal. Choose a gasket that is compatible with the type of fluid or gas that will be flowing through the pipes.
To install the gasket, place it on one of the flange mating surfaces. Make sure it is centered and covers the entire surface. Then, carefully place the other flange on top of the gasket, aligning the bolt holes.
Step 3: Insert the Bolts and Nuts
Now it's time to insert the bolts and nuts. Start by inserting the bolts through the bolt holes in the flanges. Make sure the bolts are the right length and diameter for the flanges. You can refer to the DIN standards or the manufacturer's specifications to determine the correct size.
Once the bolts are inserted, place the nuts on the bolts and hand-tighten them. Do not fully tighten the nuts at this stage. You want to leave some room for adjustment.
Step 4: Tighten the Bolts and Nuts
The next step is to tighten the bolts and nuts. Use a wrench or socket set to gradually tighten the nuts in a criss-cross pattern. This will ensure that the flange is evenly tightened and the gasket is compressed uniformly.
Start by tightening the nuts to about one-third of the recommended torque. Then, go around the flange again and tighten the nuts to about two-thirds of the recommended torque. Finally, go around the flange one more time and tighten the nuts to the full recommended torque.
It's important to follow the recommended torque values to avoid over-tightening or under-tightening the bolts. Over-tightening can cause the gasket to deform or the flange to crack, while under-tightening can result in leaks.
Step 5: Check for Leaks
After you have tightened the bolts and nuts, it's time to check for leaks. Turn on the fluid or gas supply and let it flow through the pipes for a few minutes. Inspect the flange joints for any signs of leakage. If you notice any leaks, stop the flow of fluid or gas and tighten the bolts and nuts a little more.
If the leaks persist, you may need to replace the gasket or check the alignment of the pipes again. It's better to address any issues early on to avoid more serious problems later.
Step 6: Final Inspection
Once you have confirmed that there are no leaks, do a final inspection of the installation. Check the tightness of the bolts and nuts again to make sure they have not loosened. Also, inspect the pipes and flanges for any signs of damage or wear.
If everything looks good, you're done! Your DIN steel flange installation is complete.
Tips and Tricks
Here are some additional tips and tricks to help you with your DIN steel flange installation:
- Always wear safety glasses and gloves when working with bolts and nuts to protect your eyes and hands.
- Use a torque wrench to ensure that you are tightening the bolts and nuts to the correct torque. This will help you avoid over-tightening or under-tightening.
- If you are working with large flanges or pipes, it may be helpful to use a hydraulic torque wrench or a pneumatic impact wrench to make the tightening process easier.
- Keep the bolts and nuts lubricated to prevent them from seizing or rusting. You can use a light coat of oil or anti-seize compound on the threads.
- When removing the bolts and nuts, use a proper tool to avoid damaging the threads. Do not use a hammer or other blunt objects to loosen the nuts.
Conclusion
Installing DIN steel flange bolts and nuts is not as complicated as it may seem. By following these steps and tips, you can ensure a successful installation and a leak-free piping system. Remember to choose the right type of flanges, gaskets, bolts, and nuts for your project, and always follow the DIN standards and the manufacturer's specifications.
If you have any questions or need more information about DIN steel flanges or their installation, feel free to reach out. We're here to help you with all your piping needs. Whether you're working on a small DIY project or a large industrial installation, we have the expertise and the products to get the job done right. Contact us to start a discussion about your requirements and let's find the perfect DIN steel flanges for your project.
References
- DIN Standards for Steel Flanges
- Manufacturer's Installation Guides for DIN Steel Flanges